
Faux Monoprints: Cindy's Challenge
Monoprint - a form of printing where the image can only be made once, usually onto paper from a smooth surface such as glass or metal
I took the monoprint idea a different direction this time. I didn't have colored pigment inks therefore, I figured out a way to use Distress Oxides. I wondered, is there a way to use dye inks? Sort of faux monoprints?
I cut Simon Says Stamp 40# Vellum into
5 1/2"x 8 1/2" and scored at 4 1/4" to create a side-folding card.
(TIP: When scoring vellum, use a rounded stylus or bone folder and gently score several times to carefully break fibers and mold the vellum into a crease. This will prevent the vellum from cracking or ripping when folded.)
Place the vellum card into the corner of your Misti. (I used my stamp positioner because it kept my papers in the same place with every stamp or ink change.)
Use a DYE INK to stamp an image onto the front of your vellum card.
Now, holding the vellum still in your Misti, place two pieces of 4 1/4"x 5 1/2" white cardstock on top of the vellum card. Be very careful to hold in place and do not shift or the image will smear. Vellum is non-porous and the ink will not absorb into it and it takes longer for it to dry.
I cut Simon Says Stamp 40# Vellum into
5 1/2"x 8 1/2" and scored at 4 1/4" to create a side-folding card.
(TIP: When scoring vellum, use a rounded stylus or bone folder and gently score several times to carefully break fibers and mold the vellum into a crease. This will prevent the vellum from cracking or ripping when folded.)
Place the vellum card into the corner of your Misti. (I used my stamp positioner because it kept my papers in the same place with every stamp or ink change.)
Use a DYE INK to stamp an image onto the front of your vellum card.
 |
| Memento dye ink used to stamp butterflies onto vellum |
Now, holding the vellum still in your Misti, place two pieces of 4 1/4"x 5 1/2" white cardstock on top of the vellum card. Be very careful to hold in place and do not shift or the image will smear. Vellum is non-porous and the ink will not absorb into it and it takes longer for it to dry.
 |
| Two pieces of cardstock placed onto the vellum. |
Do not remove the stamps, ink them, and stamp in the same place onto the cardstock. Apply light pressure for 5-10 seconds so the ink has time to absorb into the cardstock.
 |
| Same stamped images on white cardstock |
Clean and remove your stamps. Very carefully remove the two pieces of cardstock. Because the ink was still wet on the vellum, the cardstock placed on it absorbed the ink and created a monoprint.
 |
| Top left: Top piece of cardstock, Top right: monoprint, Bottom: vellum card |
I chose layered stamps for this process. Single layered stamps would work just as well. Continue with other stamps, rotating your vellum and paper as needed. (TIP: Stamp off the edge when doing a background. It gives it a more organic, natural look.)
 |
| Continue with the background, being careful not to shift the cardstock that is on the vellum. |
 |
| Stamped vellum |
This did take some time to create the next few backgrounds but for the effort of one print, I actually got three!
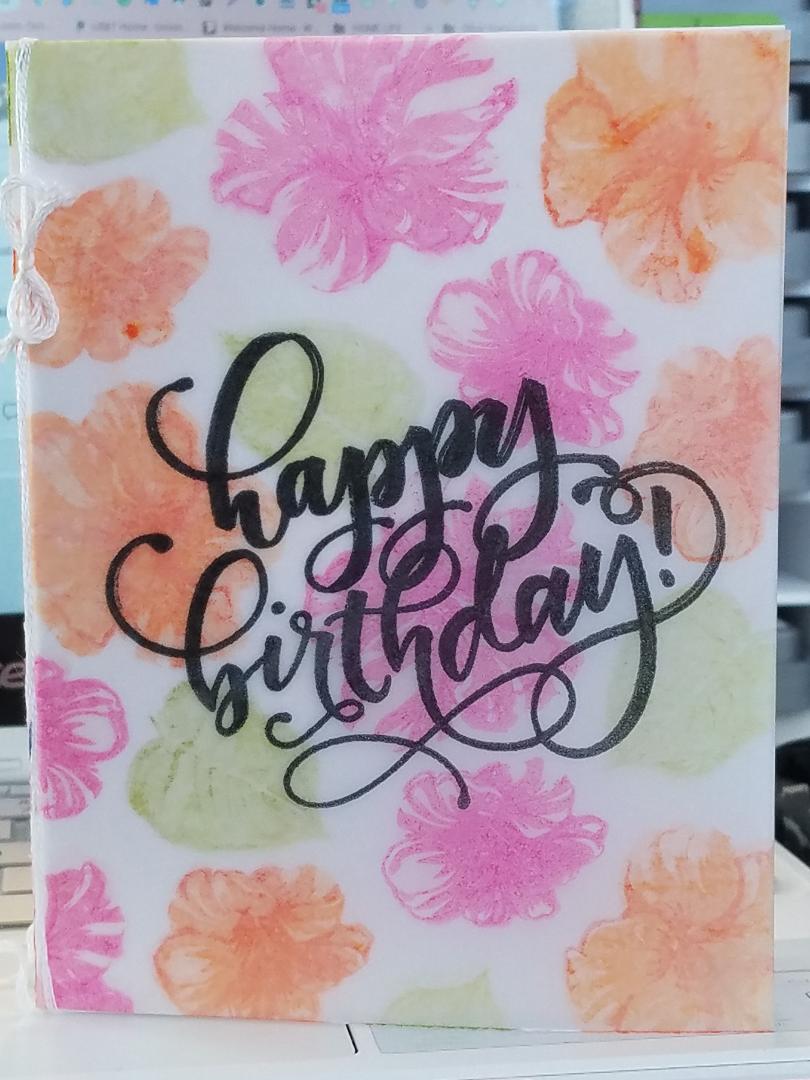
Once your backgrounds are finished, make your cards. I made a notecard of white cardstock and snugged it inside the vellum card. The print showed up more clearly and this provided a space to write or stamp a sentiment. I attached the two by tieing a string around the fold.
I kept the design very simple on the next three cards since the background is what I wanted to showcase. Sometimes a bold black sentiment is all that is needed.
From the left to the right: Top cardstock, monoprint, and then the vellum.

 |
| Vellum print |
 |
| Monoprint |
 |
| Top cardstock |
This was my monoprint experience. It truly became a Challenge! I found information on this technique by watching Jennifer McGuire's Youtube Video: Vellum Monoprint. I hope this has inspired you to try new approaches to things. Don't be afraid to experiment with the items that you have in your stash.
I would love to see your creation!
Artistically & Lovingly Yours,


Lori Ellen Designs
loriellendesigns@gmail.com
No comments:
Post a Comment